Sewing Kit for Stitching on the Go
National Sewing Month has us celebrating all things sewing related. As loyal Red Thread Studio Stitchers, we know you understand. It’s in our blood. As our lives get busy, we also know we can take our love for sewing on the road with us with our trusty sewing kit.
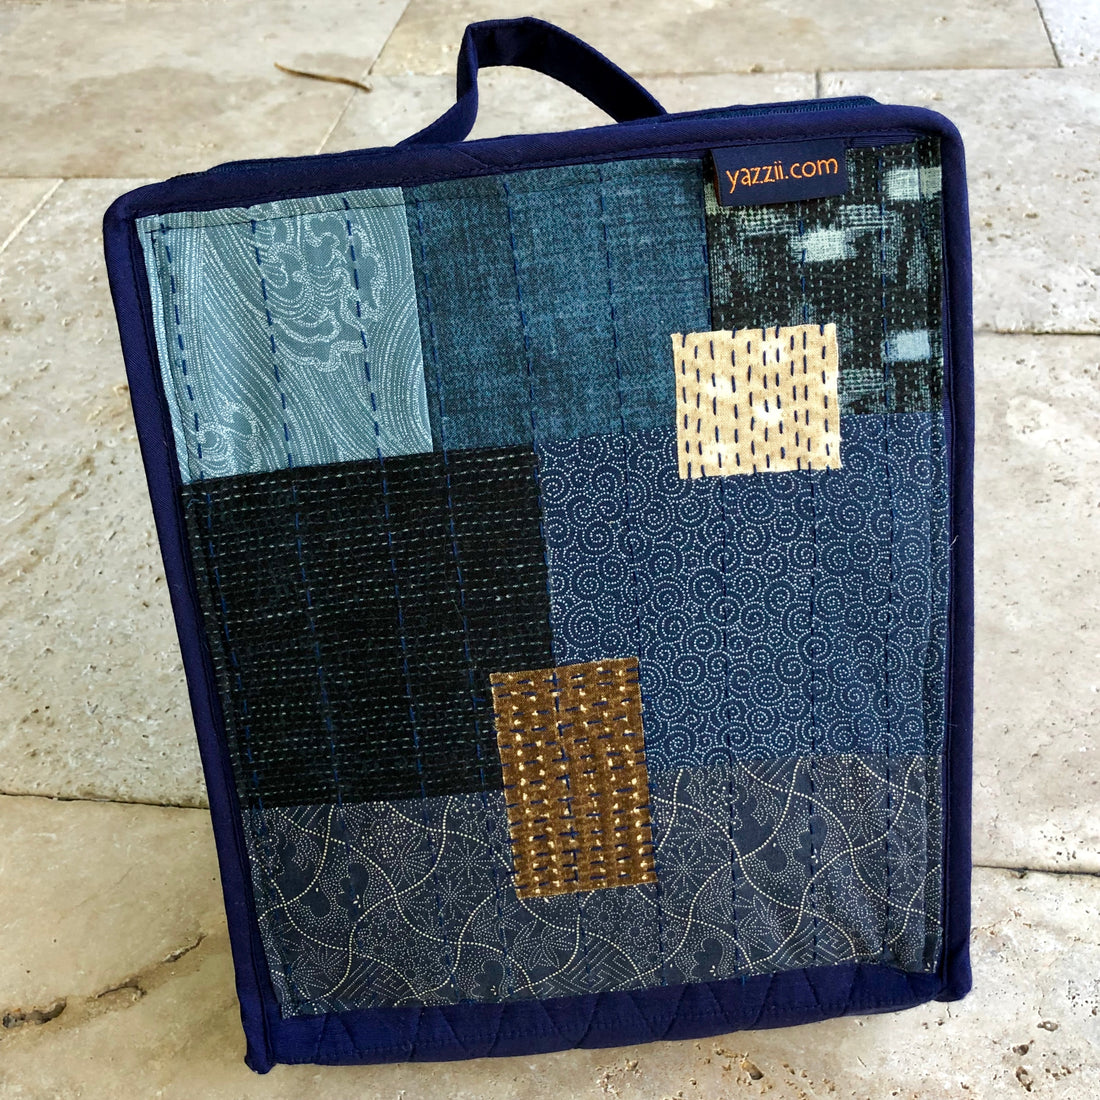
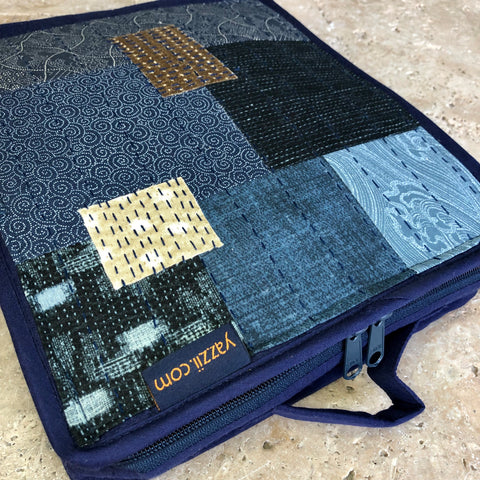
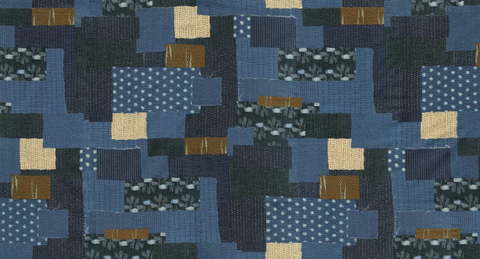
Since Boro (the art of Japanese mending) is trending, we decided to play with Moda's new Boro fabric and a Yazzii craft box to create a sewing kit that's not only useful but stylish as well.
You can create your own sewing kit with this quick and easy tutorial or shop other styles and sizes to meet your needs. Keep reading below for must-haves for your sewing kit.
Materials you will need to create your own Boro Box:
- Yazzi craft box or box or pouch of your choice
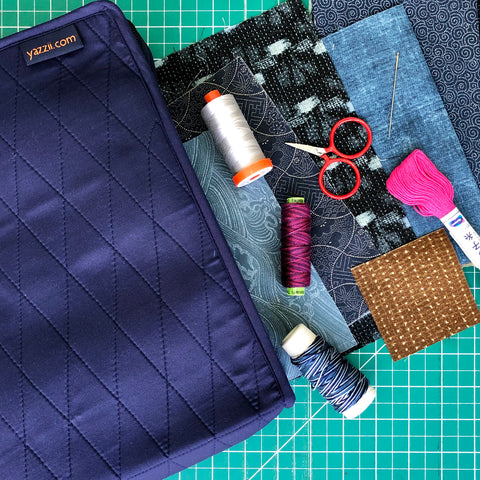
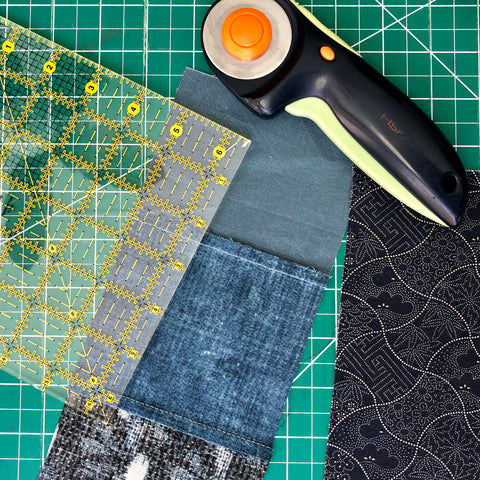
- Fabric scraps or a 12 x 9 inch piece of fabric
- Sashiko thread or perle cotton
- Sashiko needle (or any large eyed embroidery needle)
- 50 weight cotton thread
- Temporary fabric glue such as Roxanne's Glue Baste or a Bohin Glue Pen
- Optional: fusible web such as Lite Steam a Seam 2
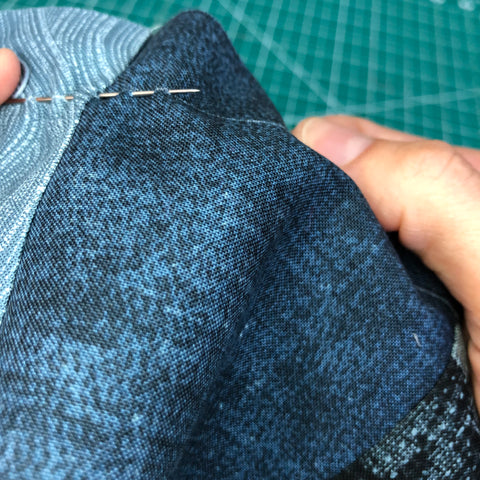
Step 1: Make your Boro style fabric
- Piece together various scraps of fabric to create made fabric that finishes 12 x 9 inches. If you are using your own craft box or pouch, adjust finished dimensions accordingly, adding 1 inch to both length and width for seam allowance (1/2 inch).
- Using temporary glue, position 2-3 patches on the 12 x 9 inch piece of fabric in a way that is aesthetically pleasing to your eye. You may also choose to fuse the patches for durability (Tutorial for using Lite Steam a Seam 2).
- Pro Tip: Skip the piecing and save time by using a 12 x 9 inch piece of Boro Bodoko in Navy.
Boro Bodoko in Navy
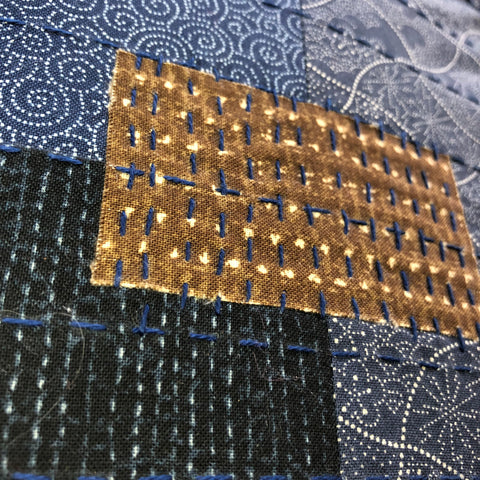
Step 2: Use Sashiko stitching to secure and to embellish the fabric patches
Using Sashiko thread or perle cotton, stitch a running stitch to create a patterned background that will reinforce the made fabric and patches. Your pattern may be simple such as horizontal rows or a more intricate design such as a traditional Sashiko pattern.
- Pro Tip: Chalk in stitching lines or use your favorite marking tool to keep your stitching lines straight.
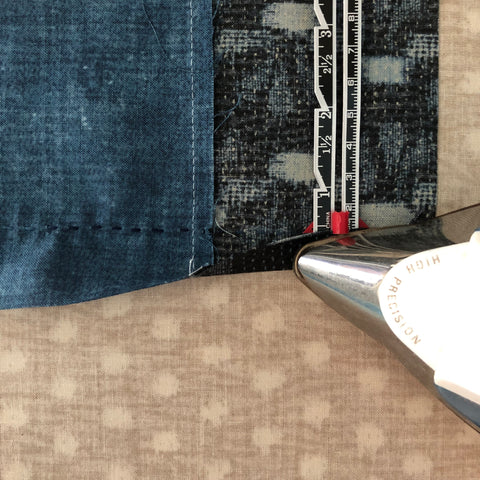
Step 3: Prepare embellished fabric to be attached to craft box
Turn embellished fabric face down on ironing surface and iron 1/2 inch seam starting with long edges and finish with short edges. Use temporary glue to attach to top of craft box
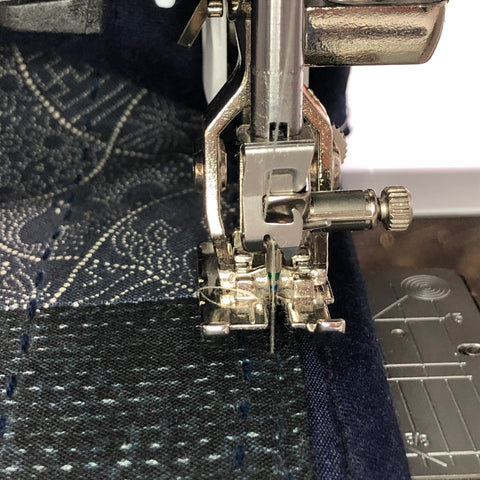
Step 4: Attached Boro fabric to craft box
Machine stitch the Boro fabric to the craft box top using a 1/8 inch top stitch, taking care not to stitch the zipper or hand appliqué it to the top.
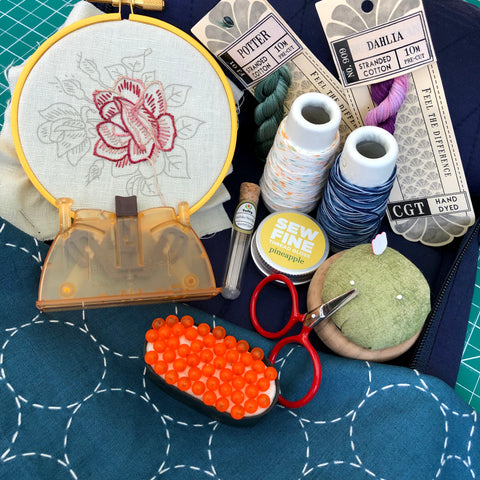
Step 5: Fill your new Boro box with stitchy must-haves
We’re curious to know, what’s in your sewing kit? We have several favorites in ours. Let’s take a look and compare.
Sewing Kit for Stitching on the Go
Thread. You can buy thread in just about any color you can imagine. Plus, you can select different weights depending on your project. Our thread selections run deep and wide.

Hand-Sewing Needles. You’ll need needles in a variety length and size. Our favorites are Tulip Hiroshima needles because they are stronger, more flexible and less likely to bend or break.

Preprinted Panels or Patterns. Both embroidery and Sashiko projects typically start with a pattern or design on fabric before you stitch. This makes choosing one the hardest part.
Embroidery Hoops. This is self-explanatory.
A Needle Threader. Use a needle threader instead of straining your eyes and frustrating yourself trying to get that piece of thread through tiny eye. We have a life changing alternative.

Scissors or Snips. Don’t pack a standard pair of scissors when you can select a pair that will match your style or be small enough to be airplane friendly.
Straight Pins. Choose straight pins with round heads—like these patchwork glasshead pins. They tend to be easier to work with than flat-headed straight pins.
Thimbles. Because they help protect your fingers from the pointy ends and get your needle through layers of fabric. Try this great pack or this one for Sashiko work.
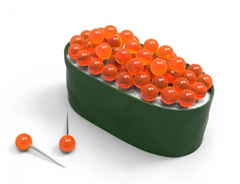
Maki Tacks -Well, because who doesn't want sushi in their Boro Box?
What's in your sewing kit? Tell us in the comments below.
17 comments
My on the go sewing kit is usually set up for appliqué. The appliqué pieces are cut, hemmed, and glued basted into position on background fabric before going into the kit. My totable is all set up to enjoy the fun of final stitch down. I have the usual suspects needed for the stitching: thread, needle, thimble, scissor. My ‘favorite’ thread cutter is a decorative round blade by Clover that looks like a pendant necklace that I wear around my neck. I don’t have to hunt for scissors in my bag and the pendant can be worn through airport security. I also include safety pins so I can roll the edges of my piece and only expose a small section at a time. The safety pins keep the rest of the work in a tidy bundle so I don’t accidentally appliqué through base and onto another section. This is super helpful when stitching appliqué on a long quilt border. I also include basic creature comforts like lip balm, tiny hand lotion, cough drop, individual wipes to clean glasses and spare pair of ‘readers’. On occasion I tuck in a photo of my inspiration or pattern jacket. Curious onlookers always wonder “what are you making?” I often included a quilt magazine to enjoy when travel situation is too bumpy to stitch. My sewing kit is a good place to tuck in an extra pair of earbuds for use with multiple devices. I can easily convert my travel kit to work on Sashiko or English Paper Piecing as the hand stitching tools overlap. Planes, trains and automobiles here I come!
This is a delightful idea, and one that I will try now that the sun is setting earlier and I have more time to craft and sew!