Guest Blog

Quilting With Denim Jeans
Quilting With Denim Jeans by Charlotte Noll I’ve been saving old denim jeans since high school. In 2017, Sherri Lynn Wood came to the Broward Quilt Expo to teach her Improv...
Quilting With Denim Jeans
Quilting With Denim Jeans by Charlotte Noll I’ve been saving old denim jeans since high school. In 2017, Sherri Lynn Wood came to the Broward Quilt Expo to teach her Improv...
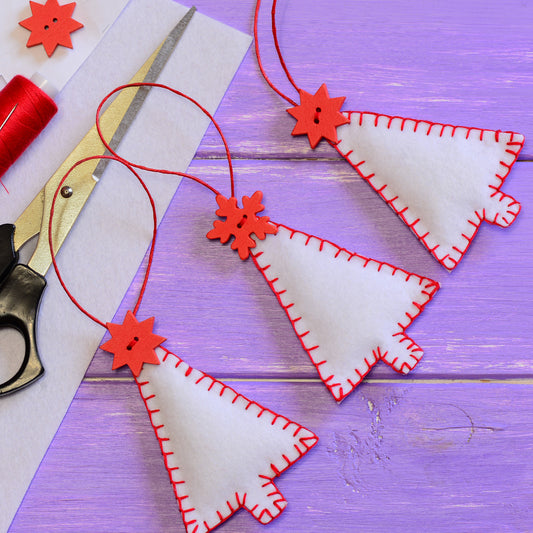
Sew Felt Christmas Ornaments Tutorial
Sew Felt Christmas Ornaments by Annabelle Short Do you know what I LOVE about Christmas? Creating Christmas ornaments for my kids. When my little girl was three, I made my...
Sew Felt Christmas Ornaments Tutorial
Sew Felt Christmas Ornaments by Annabelle Short Do you know what I LOVE about Christmas? Creating Christmas ornaments for my kids. When my little girl was three, I made my...
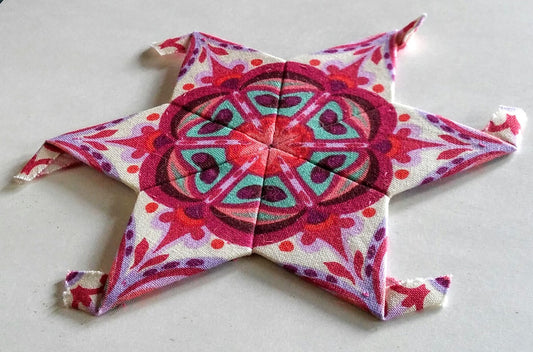
Fussy Cutting Tutorial
Fussy Cutting Complex Designs for EPP by Carolyn Pytlik Fussy cutting fabric for English Paper Piecing (EPP) can simply be cutting pretty motifs or can involve creating whole new...
Fussy Cutting Tutorial
Fussy Cutting Complex Designs for EPP by Carolyn Pytlik Fussy cutting fabric for English Paper Piecing (EPP) can simply be cutting pretty motifs or can involve creating whole new...

Hand Piecing Tutorial
The Joy of Hand Piecing by Donna Fitzpatrick Why would anyone want to hand piece? When I was learning to make quilts, one of my first projects was a sampler...
Hand Piecing Tutorial
The Joy of Hand Piecing by Donna Fitzpatrick Why would anyone want to hand piece? When I was learning to make quilts, one of my first projects was a sampler...