Sew Felt Christmas Ornaments Tutorial
Sew Felt Christmas Ornaments by Annabelle Short
Do you know what I LOVE about Christmas? Creating Christmas ornaments for my kids.
When my little girl was three, I made my first Christmas ornaments for them. Then I went on and created a bunch of these decorations with my playgroup.
And today, I will show you exactly how I did it, step-by-step.
Here's what you'll need:
- Felt sheet (you can create at least four different Christmas ornaments from one sheet)
- Needle (Chenille #24 work well)
- Scissors
- Perle cotton or embroidery floss
- Glue
- Custom printed ribbon
- Cotton balls or polyfill
- Tree template to make tree shapes
- Jingle bells and baubles or beads for decoration
Once you have all these items, you are now ready to go.
Note: In this post, we'll make three different Sew Felt Christmas ornaments. Although they're almost similar in design, I'll explain how to create each of these designs.
So let’s begin with the first, shall we?
First Sew Felt Christmas Ornament

1. Cutting Felt Sheet To Make Christmas Tree Shapes.
You can easily make Christmas tree shapes by using a tree template such as a cookie cutter or maybe even a drawing from a coloring book. All you have to remember is to cut two felt pieces of the same shape for each ornament.
Also, do not use cheap or soft fabrics for your felt sheets. It won't last too long. Instead, use quality felt sheet that is not too soft and thick.
2. Stitching Felt Pieces Together.
Using the sewing needle and a thread, begin stitching two mirror felt sheets together (see above) using a whip stitch or a blanket stitch.
3. Padding The Ornament.
Stop stitching when you are almost half the way of stitching the ornament body. You’ll need an opening to stuff something inside the felt tree to create padding.
You can use polyfill from your local craft store. But since I didn’t want to go outside, I used what I already had around the house as an alternative - cotton balls.
4. Completing Stitching.
Once you have stuffed cotton into the Christmas tree body, and you are happy about how it looks, go ahead and finish stitching the base of the tree. To hide the tied ends, you can double knot the thread and trim the ends with a scissor.
5. Adding Jingle Bells for Decorations.
Finally, add some jingles bells from last year's Christmas day to decorate your newly created hand-made piece of art. Attach those jingle bells using glue and let it dry.
6. Adding A Loop of Ribbon For Hanging.
To make a hangar for your Christmas ornament, cut a ribbon about 7 inches in length and fold in half and glue it on top of your Christmas ornament and let it dry for few seconds.
7. Decorate And Enjoy!
Finally, hang your newly created Christmas ornament around your home and enjoy!
Hey, before you go, let me also show you how to make this fantastic Christmas ornament (see below). It's super simple because it's similar to what we did earlier, with only a slight difference in decoration.
Second Sew Felt Christmas Ornament

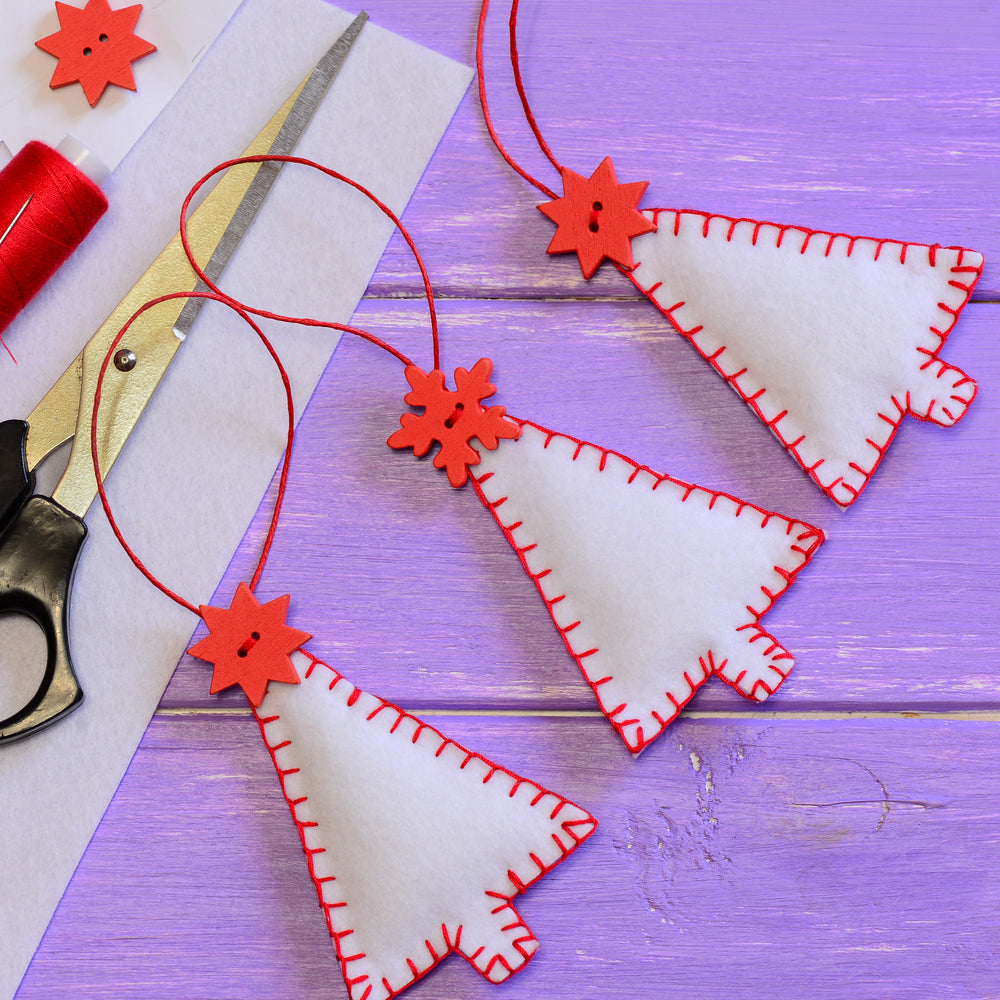
Here’s how to make this amazing Christmas ornament:
- Get a white felt sheet.
- Cut a tree shape that looks similar to what you see in this image. You can do so quickly by using a tree template.
- Next, stitch the felt sheet together using a red thread this time. Don't sew the whole body. We'll stuff the body with some cotton balls or polyfill to create padding.
- Stuff the body with cotton or polyfill.
- Continue stitching until you reach the starting point.
- Cut a piece of thread around 7 inches long, fold it, and attach it at the end of the tree top. Do this for each ornament.
- Finally attach a flake-patterned object (see above) on top of each felt tree with glue.
And that's it. Hang it on your tree and enjoy your newly created Christmas ornament.
But, hey wait, there's one more design I wanted to share. I promise you’ll LOVE it.
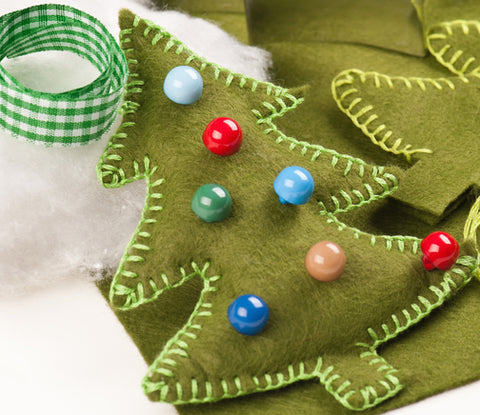
Third Sew Felt Christmas Ornament

To make this easy Christmas ornament, you only have to:
- Create a different tree shape (as shown in the image) using a tree template.
- Like before, create two mirror images of felt sheets for each ornament.
- Stitch the two mirror felt sheets together using a white thread.
- Stuff the body with cotton balls or polyfill.
- Complete the stitching.
- Attach pearl-like jingles on the body with glue.
- Finally, cut a 7-inch ribbon and fold in half. Sew the ends of the ribbon on the top of each Christmas shape to make a hangar.
That’s all there is to it!
I hope you enjoyed following this quick Sew Felt Christmas ornament tutorial. Go and browse through all the other awesome tutorials posted by my lovely friends at Red Thread Studio.
About Annabelle Short

Annabelle Short is a writer and a seamstress of more than 5 years. She splits her time between London and Los Angeles and writes for Wunderlabel. You can visit her blog to learn more about her and her work. Annabelle is a mother and she loves making crafts with her two children, Leo (age 9) and Michelle (age 11).