Stitch-Alongs
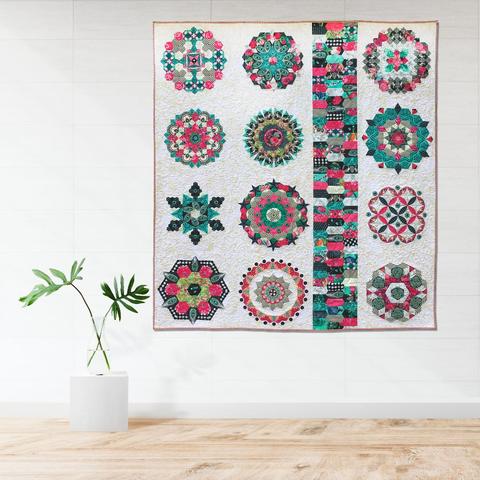
Decadence Stitch-along - Month 13 - Putting It ...
Today is my last post for our Decadence quilt. I hope all of you are working diligently to finish yours. I've enjoyed sharing with you the way I approached...
Decadence Stitch-along - Month 13 - Putting It ...
Today is my last post for our Decadence quilt. I hope all of you are working diligently to finish yours. I've enjoyed sharing with you the way I approached...
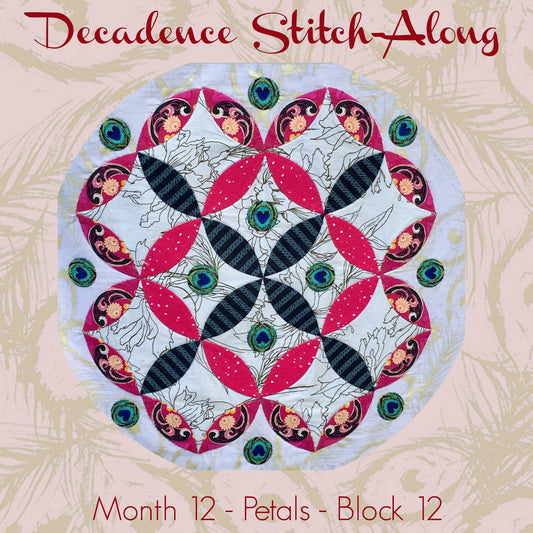
Decadence Stitch-Along - Month 12 - Petals - Bl...
Today we review our last of twelve blocks. It has been a year since we began this journey together, and together we shall continue. Many of you will still be...
Decadence Stitch-Along - Month 12 - Petals - Bl...
Today we review our last of twelve blocks. It has been a year since we began this journey together, and together we shall continue. Many of you will still be...
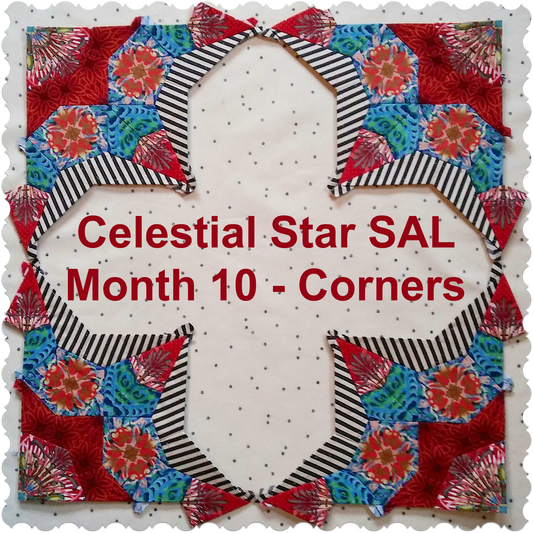
Celestial Star SAL - Month 10 - Corners
October......Delicious Autumn! My very soul is wedded to it, and if I were a bird, I would fly about the earth seeking successive Autumns. I guess I'm a Winter...
Celestial Star SAL - Month 10 - Corners
October......Delicious Autumn! My very soul is wedded to it, and if I were a bird, I would fly about the earth seeking successive Autumns. I guess I'm a Winter...
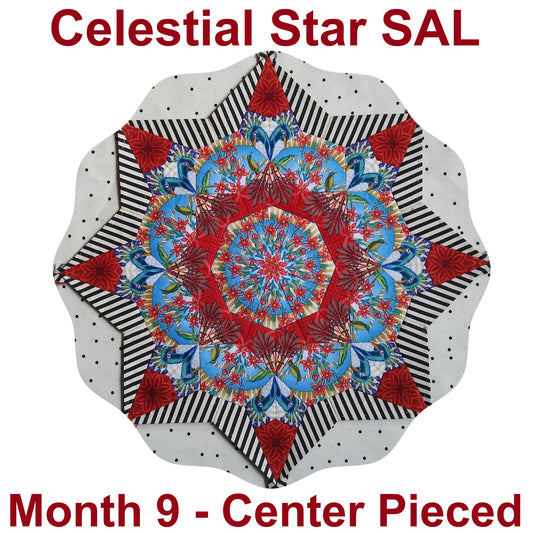
Celestial Star SAL - Month 9 - Center Pieced
It's September! And, it's our very last Color Burst. But fear not, there will be lots more fussy cutting for the Starbursts to come in November and December. If...
Celestial Star SAL - Month 9 - Center Pieced
It's September! And, it's our very last Color Burst. But fear not, there will be lots more fussy cutting for the Starbursts to come in November and December. If...
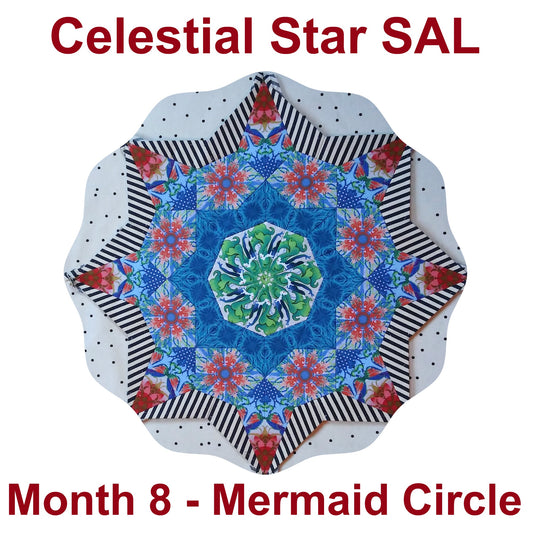
Celestial Star SAL - Month 8 - Mermaid Circle
I'm late! I'm late! I'm late! For a very important date. No time to say hello, good-bye. I'm late! I'm late! I'm late! Sorry to be late, but I unexpectedly...
Celestial Star SAL - Month 8 - Mermaid Circle
I'm late! I'm late! I'm late! For a very important date. No time to say hello, good-bye. I'm late! I'm late! I'm late! Sorry to be late, but I unexpectedly...
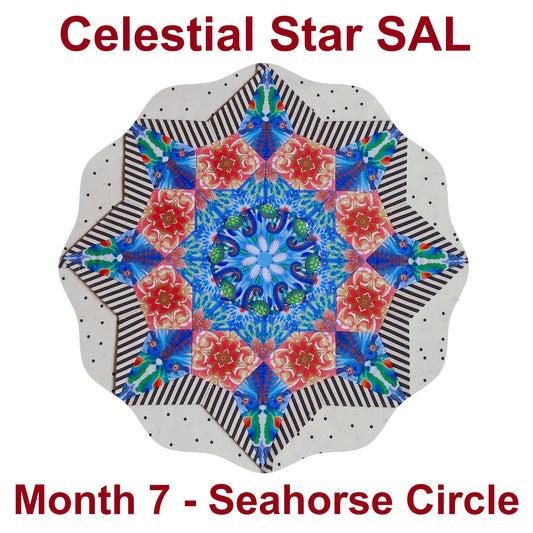
Celestial Star SAL - Month 7 - Seahorse Circle
It is now officially Summer for most of us. Longer daylight hours, vacations, Summer activities, and just a reason to relax can seriously bite into your sewing time. In...
Celestial Star SAL - Month 7 - Seahorse Circle
It is now officially Summer for most of us. Longer daylight hours, vacations, Summer activities, and just a reason to relax can seriously bite into your sewing time. In...