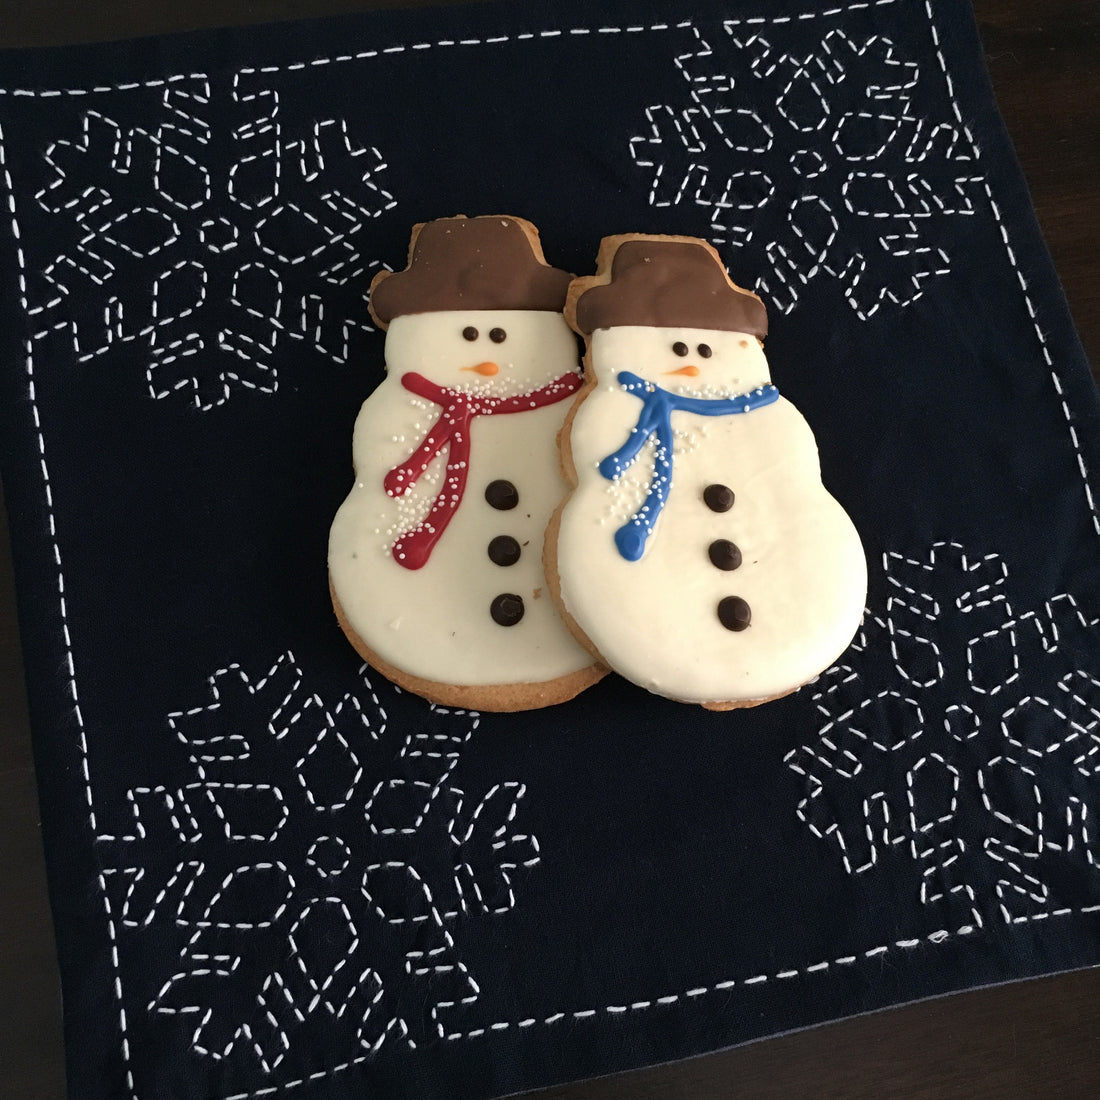
Sashiko Snowflake Napkins

Need a last minute gift idea this holiday season? These Sashiko Snowflake napkins are a quick and festive way to warm your table for the holidays or to give as a gift to the hostess.
Materials you will need:
- For each napkin: 13 x 13 inch square of Navy or Indigo fabric for the Sashiko Snowflakes (shown Sarashi-momen Sashiko fabric)
- For each napkin: 13 x 13 inch square of print or solid fabric to back the napkin
- Sashiko thread
- Sashiko needle
- Transfer paper and/or marking pencil
- Snowflake design (click here to download)

Step 1: Download and print the Sashiko Snowflake design
Once you have downloaded and printed the snowflake, use the 1 inch guide on the print out to ensure that snowflake has printed to the correct scale. For ease of transfer, cut out snowflake in a 6 inch by 6 inch square.
Step 2: Draw reference and stitching lines on the navy fabric
Using your ruler and marking pencil, measure a 1 inch seam allowance and mark reference and stitching lines on each side.


Step 3: Prepare to transfer design
Secure your navy fabric to a flat surface using painter's or masking tape. Starting in one corner, lay the transfer paper face (chalky) side down using the lines you just marked as a reference. Next, lay the snowflake design on top of the transfer paper. The snowflake design should be facing up. Secure the design with tape.

Step 4: Transfer the snowflake design onto the navy fabric
When I transfer designs using the transfer paper method, I like to use a different colored ink pen (or pencil) so that I know where I have already traced. Because Saral transfer paper can be used over and over again, I choose 4 different colored pens, one for each corner. Apply steady pressure when tracing the snowflake. Repeat for each corner.


Step 5: Hand embroider the snowflake design using Sashiko stitching
Sashiko is basically a big running stitch.
To start, thread your Sashiko needle (a Chenille needle will do) with Sashiko thread (Perle Cotton looks nice as well) and secure it with a quilter's knot. Try to start and stop your stitching on the borders. When coming to the end of a piece of thread, you may choose to weave the loose end of the thread to previous stitches on the backside instead of using a knot.
Bring the needle through from back of fabric on the line you want to stitch. Insert the needle about 1/8 inch in length away along the line to create first stitch. Bring the needle out from the back a stitch length away and continue along the line. You can also weave your stitches in and out of the fabric to make several stitches at once.

Stitch all four snowflakes as well as the border lines.
Step 6: Trim edges and pin
Because the stitched fabric may shrink or pucker as you stitch, it is necessary to trim the finished piece down. Place the navy fabric right sides together with the backing fabric and trim approximately 1/4 inch on each side so that you are left with a 12.5 inch square.
Pin all four sides in place, leaving approximately 2 inches on one side to turn the napkin right side out.

Step 7: Sew napkin together and turn napkin right side out
Using a 1/4 seam, sew all four sides together leaving an approximately 2 inch gap to allow the napkin to be turned right side out. Trim the corners on the diagonal to reduce bulk.
Once sewn, turn the napkin right side out using a pointed tool such as a chop stick to shape the corners.
Gently iron the napkin from the back side (so as not to crush the embroidery). IMPORTANT NOTE: read the instructions carefully for the brand of transfer paper that you are using; otherwise, the transfer lines may heat set. You may need to wash your napkin before ironing. You can iron the transfer lines left by Saral transfer paper as they do not heat set.
Top stitch with a 1/8 inch seam allowance, if desired.
Repeat steps 1-7 for as many napkins as you would like to make!

Happy Holidays to You and Yours from Me and Mine!

